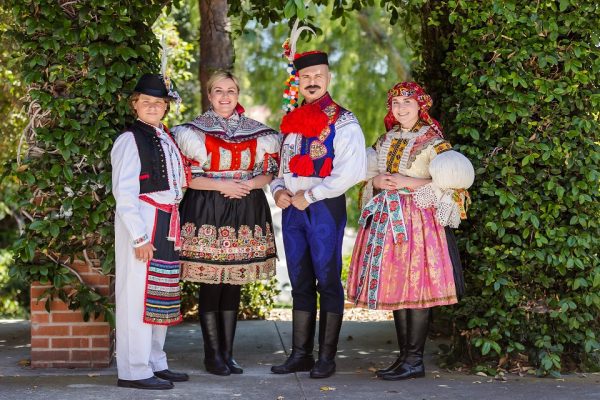
Today we have a guest post article on the stitching of traditional Czech aprons. Often seen over a kroj, many people believe these Czech aprons are a part of traditional kroje, but they are also a stand alone apron. We hope you enjoy the article…
My Czechoslovakian mother and grandmother gave up trying to teach me traditional embroidery when I was a child, because I’m left-handed. But I was always fascinated with the patterns, so I taught myself the techniques when I was in my early twenties. Today I start every embroidered apron project with research; I’m usually looking for an inspiring design of Czech aprons from a particular region or village to reproduce for the members of my folk-dance group.
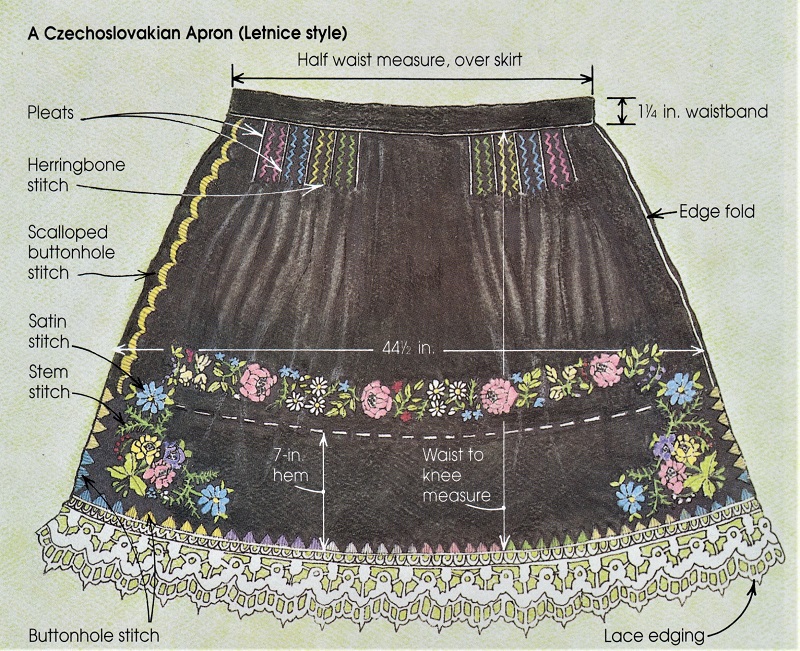
I look through my own large collection of Czechoslovakian books, or visit people I know, like Helene Cincebox, who have original garments. Once I find an authentic design I like, I make a freehand drawing that I transfer to fabric with dressmakers’ transfer paper. Most aprons are stitched on either black or navy fabrics, so I use yellow transfer, or draw directly with a white marking pencil.
Appropriate fabrics for these Czech aprons can include velvet and satin, but from most villages, including my ancestral village of Letnice (about 20 kilometers from Ratiskovice), the fabric is plain or polished cotton. I needed only two pieces, the apron and waistband, as in the drawing for the Letnice apron I’m wearing in the photo below.
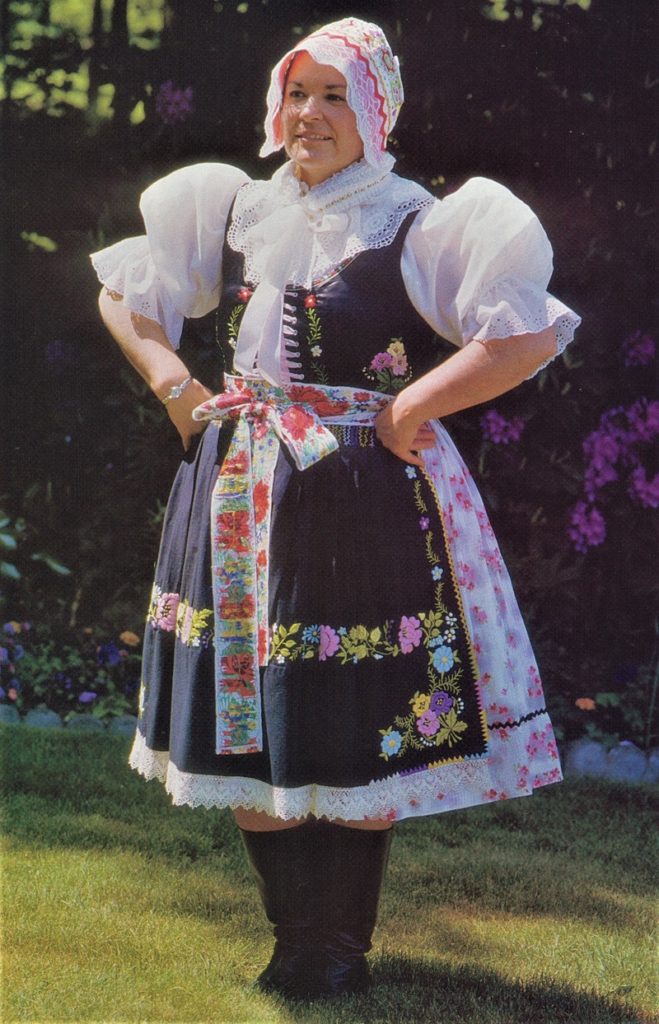
For most adults, 45-inch-wide fabric will gather or pleat down perfectly to fit the waistband. The waistband is measured to fit from side to side across the front half of the waist only, and the length is measured to fit from the waist to knee, plus a 7-inch hem. This is the standard hem width on the aprons I’ve examined, regardless of the width of the embroidery on top of it.
Before I transfer my design, I hem the fabric by hand with matching thread, but leave it unattached to the waistband strip and unpleated. Then, starting at one end, I stretch the fabric in a wooden hoop and embroider from one end to the other with the stitches described, stitching through two layers when I’m working over the hem area.
Individual motifs must be stitched from the center outwards to prevent distortion and puckering, and it’s vital to remove the fabric from the hoop whenever you’re not working on it, for the same reason. Next, I finish the hem and side edges, attaching all cotton lace to the hem edge with the finishing stitches; pleat the waist edge to fit the band; and attach the band by hand with a running stitch. The final step is attaching string or ribbon ties to each end of the band.
Only two stitches are needed for the main design of the Czech aprons, the satin stitch and the stem stitch, both shown in the drawings.
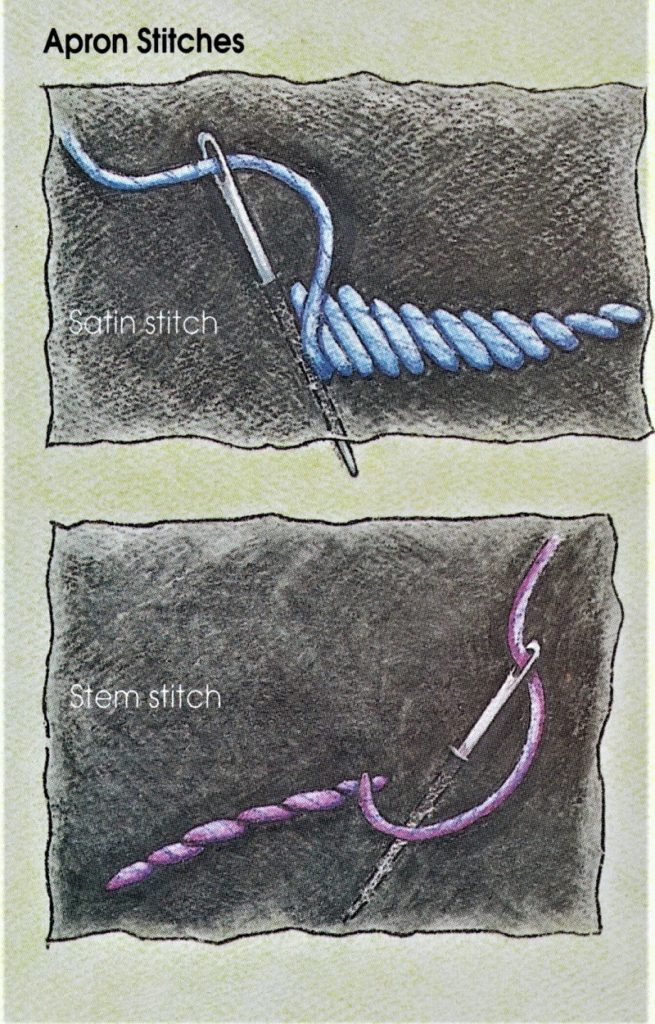
I pull the needle all the way through to the back for each satin or stem stitch, instead of pushing the point out to the front to start the next stitch, as shown in most books; I think it’s easier to control the tension that way.
For the edge finishing, I use a buttonhole stitch changing the length of the stitch to create the jagged edge of “wolfs teeth” on the inside. About halfway up each side I switch to a scalloped buttonhole stitch, worked just inside the edge. The pleats (each one is about 1/2 inch deep) are held together with a few rows of herringbone stitch.
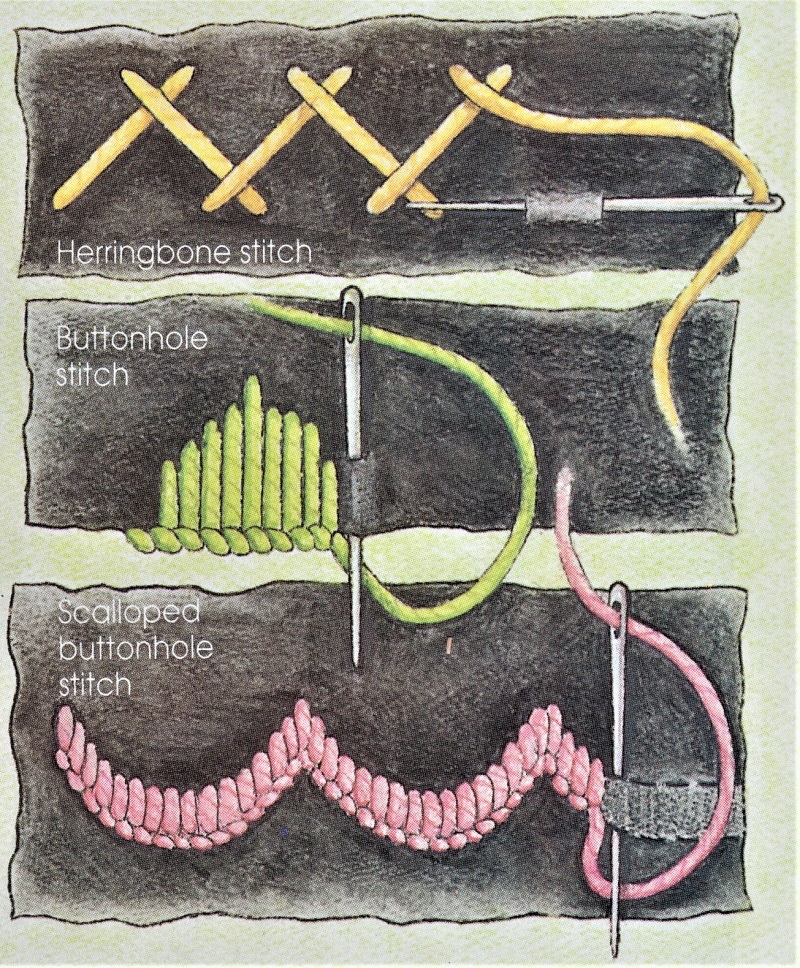
It’s important that the back of the work look almost as good as the front, of course, so there are no knots; starting ends are caught by the subsequent stitches on the wrong side and finishing ends are pulled under or woven into previous stitches.
Connecting threads from part to part within motifs are always hidden under previous stitches. With such simple stitches the artistry of the embroiderer is revealed primarily in the beauty of the design, and the embroiderer’s skill, or lack of, is impossible to hide.
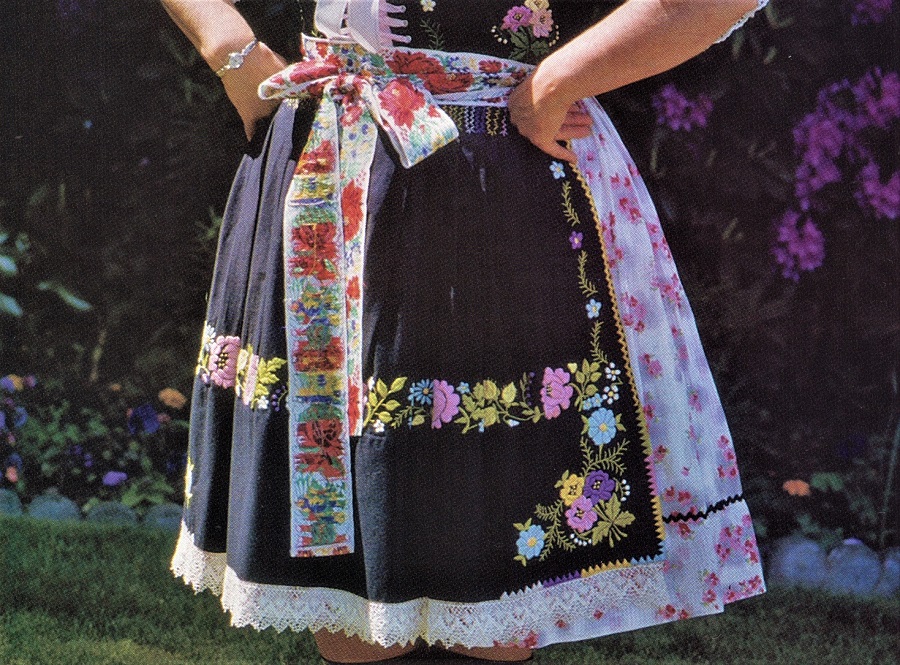
This guest post was written by the late Elizabeth Borovicka Capozzi who taught folk dance and embroidery in Binghampton, N.Y. It originally appeared in Threads Magazine, December 1990/January 1991.
We know that you could spend hours, days, weeks and months finding some of this information yourselves – but at this website, we curate the best of what we find for you and place it easily and conveniently into one place. Please take a moment today to recognize our efforts and make a donation towards the operational costs of this site – your support keeps the site alive and keeps us searching for the best of our heritage to bring to you.
Remember, we rely solely on your donations to keep the project going.
Thank you in advance!
If you have not already subscribed to get TresBohemes.com delivered to your inbox, please use the form below now so you never miss another post.


